A two part acrylic adhesive can provide rapid strength development and durable bonding across metals, plastics, composites, and coated substrates. Its fast cure makes it useful in automotive trim, transportation equipment, industrial assemblies, and other production lines where parts must move quickly to the next process.
Fast reaction also leaves little room for uncontrolled mixing or delayed assembly. Incorrect proportioning, incomplete blending, expired working time, contaminated substrates, or movement during curing can all reduce bond performance. Effective troubleshooting should examine the complete application process rather than assuming every failure is caused by the adhesive formulation.
Two-component acrylic systems contain a resin and an activator or hardener. The specified ratio ensures that the components react correctly and develop the intended strength, flexibility, and durability.
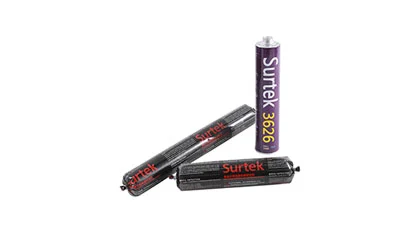
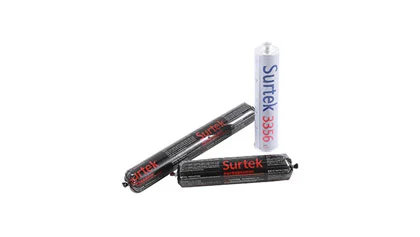
Surtek Secubond 805 and Secubond 905 use a 10:1 mixing ratio. Both products have a reference working time of 4–6 minutes. Secubond 805 has a pressing-time reference of 19–21 minutes, while Secubond 905 has a reference of 18–20 minutes under laboratory conditions. Actual production performance must be verified with the substrates, temperatures, joint geometry, and dispensing equipment used on the line.
Common ratio problems include:
Incorrect cartridge or pump settings
Unequal component flow
A blocked dispensing line
Air trapped in one component
Worn pump seals
An unsuitable static mixer
Stopping and restarting after adhesive has begun curing inside the nozzle
A mixed bead should have a uniform color and texture. Visible streaks may indicate inadequate mixing or uneven component flow.
For automated production, periodically verify the output ratio by dispensing each component separately and weighing or measuring it. The dispensing system should also be recalibrated after maintenance, material replacement, or extended shutdown.
Working time begins when the two components contact each other. It includes dispensing, adhesive application, part positioning, joint closure, and any required clamping.
Once the working time has expired, viscosity increases and wetting ability declines. Applying additional pressure may close the joint physically, but it cannot restore the adhesive’s original flow or surface contact.
Typical signs that assembly exceeded the working window include:
Weak adhesion despite an apparently cured bead
Poor transfer to one substrate
Thick ridges that did not spread under pressure
Edge lifting
Inconsistent strength between the beginning and end of a long assembly
Adhesive curing inside the static mixer
Temperature strongly influences the practical assembly window. A warmer adhesive, substrate, or workshop can accelerate reaction, while colder conditions may slow strength development. The line should therefore establish a qualified process range instead of relying only on room-temperature laboratory values.
Acrylic structural adhesives are known for developing handling and structural strength relatively quickly compared with many epoxy systems, but the exact open time and fixture time remain formulation-specific.
Acrylic adhesives are often more tolerant of limited surface preparation than some other structural adhesive chemistries. However, “tolerant” does not mean that oil, dust, moisture, release agent, or loose coating can be ignored.
Before bonding, check the substrate for:
Machining and forming oil
Fingerprints
Dust and abrasive residue
Condensation
Oxide layers
Mold-release agents
Weak paint or powder coating
Plasticizer migration
Protective-film residue
A practical preparation sequence may include cleaning with a compatible solvent, allowing the surface to dry, and abrading glossy or heavily oxidized materials when required. Any abrasion debris must be removed before adhesive application.
Production trials should use the exact substrate grade, coating, and manufacturing condition. Two visually similar plastics or painted metals may have very different surface energies and adhesion behavior.
When a bond fails cleanly at the adhesive-to-substrate interface, investigate contamination and surface compatibility first. When paint or coating separates from the base material, the adhesive may be stronger than the coating itself.
The adhesive must wet both surfaces and maintain a continuous bond line. Too little material can leave dry areas, while excessive adhesive can increase squeeze-out, cost, and cure heat.
Joint design should account for:
Surface flatness
Gap variation
Adhesive viscosity
Required bond-line thickness
Assembly pressure
Expected movement between substrates
Peel and impact loading
Pressure should bring the components into complete contact without forcing most of the adhesive from the joint. Fixtures must hold the parts in position until sufficient handling strength has developed.
Avoid changing joint position after the adhesive begins setting. Late movement can damage the partially formed polymer structure and reduce final strength even if the joint appears normal from the outside.
The failure surface often provides more useful information than the strength value alone.
| Failure Appearance | Likely Area to Investigate |
|---|---|
| Adhesive stays on only one substrate | Surface contamination or poor compatibility |
| Soft or sticky adhesive | Incorrect ratio or incomplete mixing |
| Brittle or unusually hard bead | Ratio error, excessive cure heat, or unsuitable formulation |
| Failure inside the adhesive | Joint load, bond-line thickness, or adhesive strength |
| Substrate tears before the adhesive | Bond may exceed substrate strength |
| Failure starts at the joint edge | Peel stress, inadequate coverage, or poor edge preparation |
| Random weak areas | Air pockets, uneven dispensing, or inconsistent pressure |
| Strength varies by production shift | Temperature, storage, calibration, or operator differences |
Do not diagnose a failure only from the final broken part. Review the material batch, dispensing records, ambient conditions, line speed, assembly time, and fixture-release time.
Unopened components should be stored according to the current technical data sheet and protected from excessive heat, contamination, and incorrect material rotation.
Before restarting a line after shutdown:
Confirm both components are within shelf life.
Inspect hoses and cartridge outlets.
Purge material until both components flow consistently.
Install a new static mixer.
Dispense an initial bead onto scrap material.
Check bead uniformity before bonding production parts.
If the application repeatedly blocks mixing nozzles, review idle time, nozzle size, material temperature, and shutdown procedures. A longer nozzle does not always improve performance; excessive residence time can allow the adhesive to react before it reaches the joint.
A reliable two part acrylic bonding process should record:
Adhesive model and batch
Mix ratio
Dispensed quantity
Substrate and coating batch
Ambient and substrate temperature
Time from dispensing to assembly
Fixture or pressing time
Visual bead condition
Handling-strength result
Final bond-test result
These records make it easier to separate material-related problems from dispensing, substrate, or production-line variation.
An incorrect mix ratio can cause incomplete curing, reduced strength, excessive brittleness, a soft or sticky bond line, and inconsistent working time. Check the cartridge, pump settings, material flow, static mixer, and dispensing calibration before changing the adhesive.
A properly mixed bead should have a consistent color and texture without visible streaks. Uneven color, soft areas, or different curing behavior across the bead may indicate blocked lines, unequal component flow, trapped air, or an unsuitable static mixer.
Once the working time has expired, viscosity rises and the adhesive loses its ability to wet both substrates effectively. The joint may appear closed but can develop weak adhesion, poor transfer, edge lifting, or inconsistent strength after curing.
The surface should be free from oil, dust, moisture, loose coatings, release agents, oxidation, and protective-film residue. Depending on the substrate, preparation may include compatible solvent cleaning, drying, and controlled abrasion followed by removal of all debris.
Adhesive remaining on only one surface usually indicates an interfacial adhesion problem. Possible causes include contamination, low surface energy, an incompatible coating, insufficient wetting, or assembly after the practical working time had expired.
Record the adhesive model and batch, mix ratio, dispensing quantity, substrate condition, temperature, assembly time, pressing or fixture time, bead appearance, and bond-test results. Regular calibration and controlled production trials help separate adhesive problems from process variation.
Most acrylic adhesive problems can be traced to one of four areas: incorrect mixing, assembly outside the working time, unsuitable surface conditions, or uncontrolled joint movement. Reviewing these factors systematically is more effective than immediately changing the adhesive or increasing the applied quantity.
Surtek supplies Secubond 805 and Secubond 905 two part acrylic adhesive systems for bonding metals, plastics, composites, and automotive interior components. We can evaluate substrate combinations, joint geometry, production speed, dispensing equipment, working-time requirements, and validation methods to help manufacturers establish a stable bonding process.
 English